You can import an existing SRT into DaVinci Resolve without a direct Smoothy bridge. Blackmagic documents automatic transcription as a Studio feature in its Resolve 20 guide. The workflow below generates the subtitle file separately and includes a correction pass.
Which leaves most people doing one of two things: typing captions by hand, or paying for Studio just to get subtitles. There’s a better free path — and it takes about the same amount of time as importing a clip.
A dedicated DaVinci Resolve plugin is coming soon. SmoothyEdit currently connects to Premiere Pro. The steps below let Resolve Free users get the same result today using a plain SRT file.
The short version
- Transcribe your audio with SmoothyApp (free, runs on your machine).
- Export the result as an SRT file.
- Drop the SRT into DaVinci Resolve as a subtitle track.
No Smoothy Studio subscription is needed. Review automatic text and timestamps before using the file.
Step 1 — Get a transcript (free, offline)
SmoothyApp’s caption tool uses Whisper locally, so the media stays on your machine. Initial engine and model setup can require an internet connection; after setup, transcription can run offline. In the app:
- Open the Captions tab.
- Choose your source. You can transcribe straight from a Premiere sequence, or — if you don’t use Premiere at all — switch to Audio / Video File and pick your exported audio or video file directly. You don’t need Premiere installed to get subtitles.
- Click Generate Captions. Choose the language, model and engine for your source. Auto uses available acceleration and can fall back to CPU. You can cancel if you want to stop early. Correct text and cue timing before export.
- Click Save SRT.
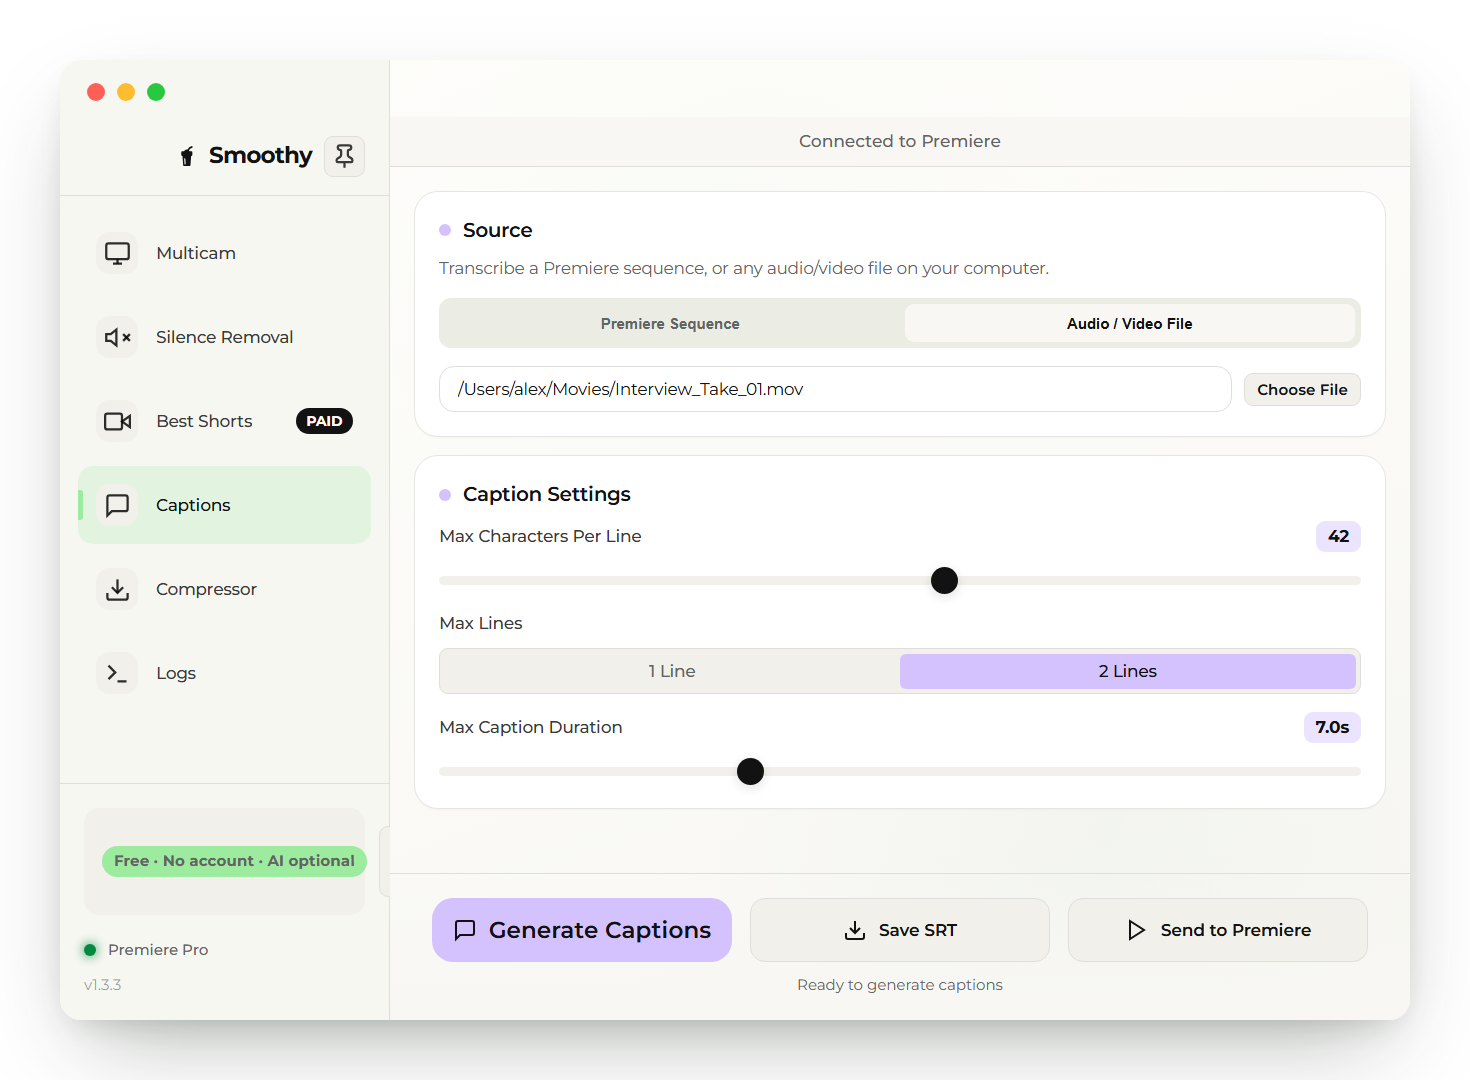
In the Captions tab, switch the source to Audio / Video File to transcribe any clip on your machine — no Premiere sequence required.
Word-level timing is already baked in, so the timings are accurate rather than eyeballed.
Step 2 — Import the SRT into DaVinci Resolve
This is the part that surprises people: Resolve Free can display subtitles perfectly — it just won’t generate them for you. Importing an SRT is fully supported on the free tier.
- In Resolve, open the Edit page.
- In the media pool, right-click and choose Import Media, then select your
.srtfile (or drag it into the pool). - Right-click your timeline, choose Add Subtitle Track, then drag the imported SRT from the media pool onto that subtitle track.
- Trim or nudge the subtitle clip so it lines up with the start of your programme audio.
That’s it — a full subtitle track, styled and editable like any other caption in Resolve.
Why this works so well
There’s a reason an SRT handoff is the pragmatic choice rather than a hack:
- SRT is widely supported. Check the subtitle formats accepted by your destination editor or platform.
- Timings come from the audio, not from you. The whole point of transcription is that the machine does the tedious part.
- It’s genuinely free. Resolve Free plays subtitles; SmoothyApp makes them. No monthly fee on either side just to caption a video.
- It stays local. Your audio never leaves the machine.
Common questions
Do I need DaVinci Resolve Studio? No. You only need Studio for Resolve’s own auto-transcription. Importing an SRT you already have works on the free version.
Can I use this without Premiere Pro? Yes. Switch the captions source to Audio / Video File and pick the media directly — Premiere isn’t required.
Will the subtitles be editable afterwards? Yes. Once the SRT is on a subtitle track you can adjust font, position, timing, and styling in Resolve’s Inspector like any other subtitle.
What about other editors? The exported SRT works with applications and platforms that accept that format, including Premiere Pro and YouTube. Check each destination’s import options.
Current integration limits
A native Resolve bridge is marked coming soon and is not bundled with SmoothyApp. There is no release date or shipped one-click Resolve workflow to rely on today. Keep the SRT with the project and check its timing after any subsequent edit.
Use the local caption guide for model selection and corrections. Join our Discord for product updates.